Welcome to 2017, everyone! We thought we would kick off the New Year by brain-dumping everything we know about setting up an event on YouTube Live. It’s a great platform that, in our estimation, covers at least half of all use-cases with a live stream. As mentioned in past articles, it is not without its shortcomings. But at the end of the day, YouTube Live is a powerful platform for streaming just about any live event.With that said, let’s dive right in!
Getting Started
First things first: you will need to enable your account for live streaming. You can do this by going to your Live Events Panel and clicking on “Enable Live Streaming.” You’ll need to verify your account, so have your cell phone handy.
If you wish to embed your stream somewhere other than YouTube, you’ll need to link your YouTube account to Adwords. The approval process can take up to 48 hours, so make sure you get this done well before you intend to stream!
Once approved, you’ll simply go into Creator Studio > Channel > Status and Features, and turn on embedding.
Next: selecting your streaming software!
Choosing the Right Streaming Software

There are more and more software packages available that offer streaming to YouTube every day. Luckily, YouTube keeps a list of recommended software. All recommended software integrates natively, meaning that by inputting your YouTube login credentials, you will be able to stream to YouTube Live directly. This is actually A Big Deal: it takes out the complex (and error-prone) process of entering your RTMP address and unique stream key.
Want our recommendations on which software to use? Well, sure! Here you are:
- Streaming from your iPhone? Use WireCast Go. Very robust for a free app and for $6 you can turn it into a mini live switcher.
- Prefer open-source software? Open Broadcaster Software (OBS) is for you. It’s well-documented and the gaming community loves it.
- Want to use the industry standard? Stick with WireCast Pro. Version 7, their latest release, has some remarkable features. . You can get an overview from our friends over at the Tech Buzz here.
Let’s Go Live!
So we have enabled our account, and we’ve selected our software. We’re now ready and able to start streaming! If you look in your Creator Studio > Live Streaming sub-menu, you have two options: “Stream Now” and “Events”.
Using the “Stream Now” Option
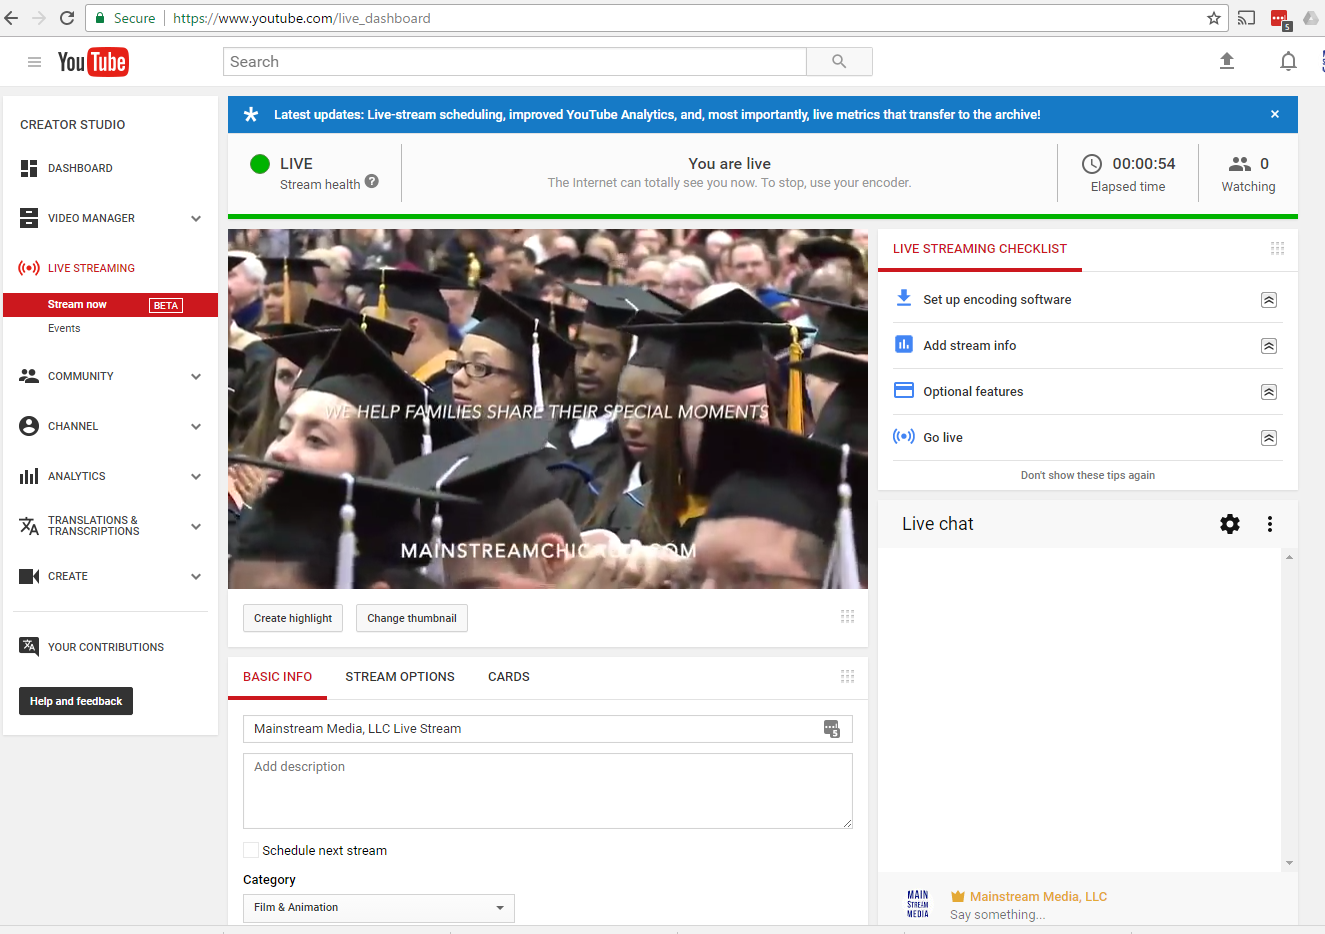
Selecting the “Stream Now” Option pushes you directly to your public live stream control room. Here, you control your entire public broadcast. (If you want to create a broadcast that isn’t publicly available, you’ll want to read about the “Events” Option.)
Your stream will show as Offline until you start pushing content from your encoder. Prior to streaming your show, it’s helpful to change your video title and description. This will display on your stream’s watch page as well as the archived recording of your event.
When you begin pushing content, you will see a light turn green. At this point, in the parlance of Google, “people can totally see you now.”
Links to share your stream are located at the bottom right of the page. You can use that link to go directly to your stream’s watch page, where you can also get its embed information. IMPORTANT NOTE: this code will change every time you go live, so you can’t just continuously embed your public live stream. If you are embedding regular streams, remember to swap in your new embed code!
During the stream, you can also manage your chat from the same Control Room.
BONUS TIP: If your YouTube Live event becomes popular, you will see it pop up on YouTube’s Live Stream front page This can introduce your event to a whole new audience!
So, “Stream Now” is great if you want an impromptu, public event. However, if you need control over who sees your stream or when it begins, you’ll need to manually create an event.
Using the “Create Event” Option
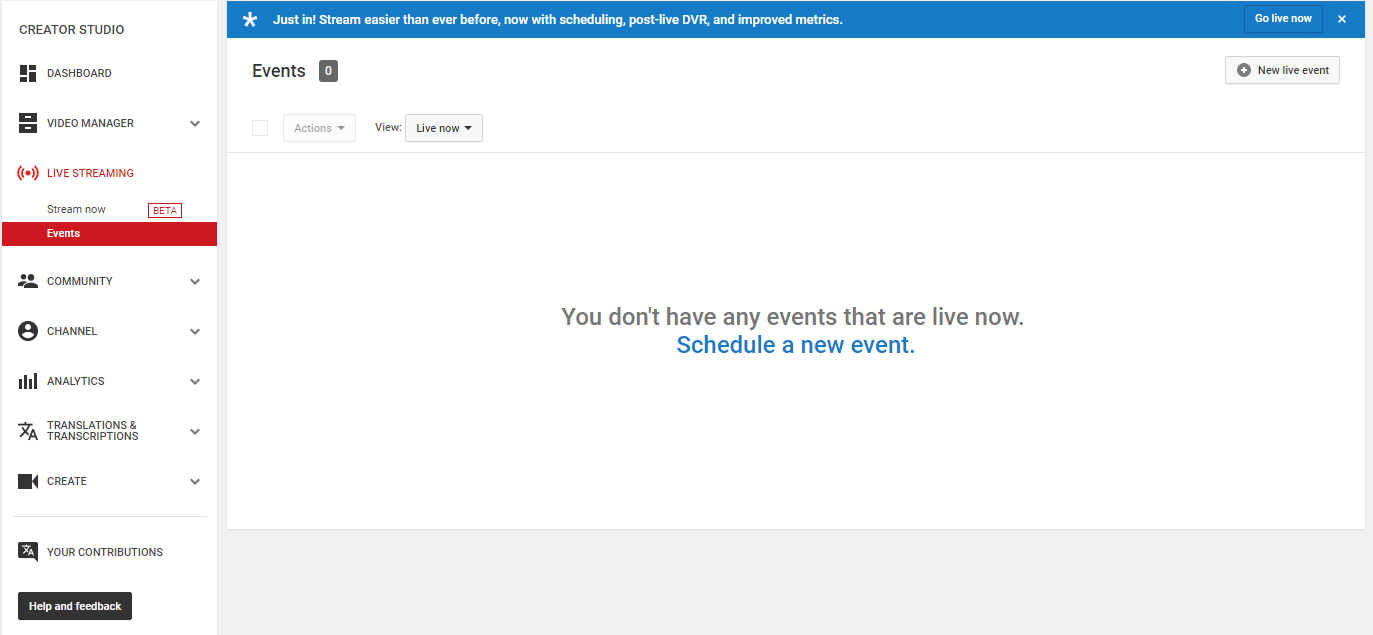
First: schedule an event. When creating your event, you’ll enter the same info as you would any YouTube video: title, description, keywords, and so forth.
Next: choose your sharing options. If your event is meant for a closed audience, then select “unlisted”. That keeps your event from being indexed for search, though it does not prevent people from publicly sharing your link.
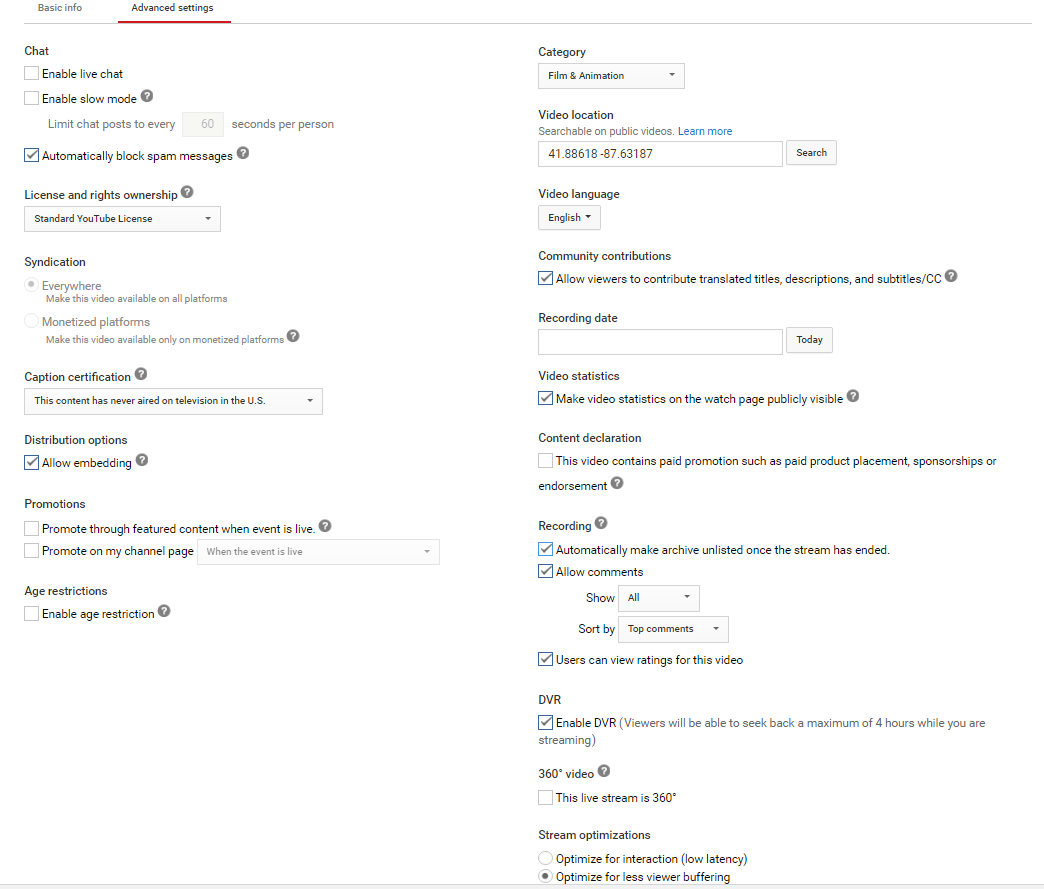
You will then want to check out your Advanced Settings. Here you can enable or disable chat, prevent the stream from being promoted on your page, and so on. For an unlisted stream with no chat, here is how we commonly set our advanced settings:
Once that’s done, choose your encoding options: Google Hangouts or custom. Google Hangouts recently folded some of its technology into YouTube Live, so if you are planning on broadcasting a conversation between you and up to 10 Google Hangouts participants, you will actually create that event through YouTube Live. We have used it to host some great Q&As. Here’s an example of it in action. For most broadcasts, however, you’ll use the “custom” setting.
On the next page, we’ll set our ingestion settings. Choose a thumbnail if you have a special one for your event; if you do not, YouTube uses your profile image as a place holder. Next, set the maximum sustained bitrate for your encoder. Very recently, YouTube Live has enabled 4K Live Streaming – which is very exciting! There are very few places that can support a 30Mbps upload speed, but we hope to see it more widely adopted in the future.
YouTube provides its own guidance on the relationship between bitrate and resolution, but our experience has led us to different conclusions. Here is our loose guide for choosing the correct resolution and bandwidth. If your venue has:
- 15Mbps upload speed or better: use 1080p
- 10-15Mbps upload speed: 720p
- 6-10Mbps: 480p, though there are some cases where 720p is okay (i.e. not a lot of animation or dramatic scene changes)
- 3-5Mbps: 360p-480p
- Under 3Mbps: 240p
In most cases, you should not have to use custom ingestion settings: just select one of YouTube’s presets. In fact, many encoders will not like custom ingestion settings and may throw an error at you when you attempt to broadcast.
When you have selected your bitrate, then you will be prompted to select your encoder. If you are using one of YouTube’s (or our) recommended encoding platforms, you should just leave this set to “other encoder”. IF YOU ARE USING WIRECAST PRO, DO NOT SELECT THE “WIRECAST FOR YOUTUBE” OPTION. I know that’s confusing, but “WireCast for YouTube” is a different piece of software entirely, so just leave the settings as is.
Once you have authenticated YouTube in your encoder, you should be able to see your event as a stream location. Simply select it, press stream, and you’re good to go! To confirm your stream is working, go to your event’s Live Control Room. It might take a couple of minutes for your stream to come through once you have begun streaming from your encoder, and you may have to refresh the page a few times. (Don’t worry! Refreshing the page won’t break anything!) When the signal comes through, you will see the green light.
Click on “Preview to send your stream to the Preview window. Again, you might have to refresh a couple times before it actually plays, and that’s perfectly fine. Once it’s there, you’re good to go: hit start streaming, and you’re live!
BONUS TIP: Use YouTube’s Live Editing Feature! It’s especially useful if you’re producing a long day full of numerous sessions (a conference with many panels, a tournament with many games, an awards ceremony with tons of speeches) – you can upload those individual clips in real-time to your channel. Very handy!
Engaging the Audience
There’s nothing like connecting to an audience in real-time and interacting with them directly. What a powerful tool that we use, where we can connect to thousands of people instantaneously!
The standard tool for engagement is the Chat window. Chat is a fantastic tool to engage your audience or to let your audience engage itself. Unfortunately, you cannot save the chat logs after an event: however, you can add moderators, who can highlight questions, ban bad actors, and so on. This is especially important if your event has a Q&A aspect to it.
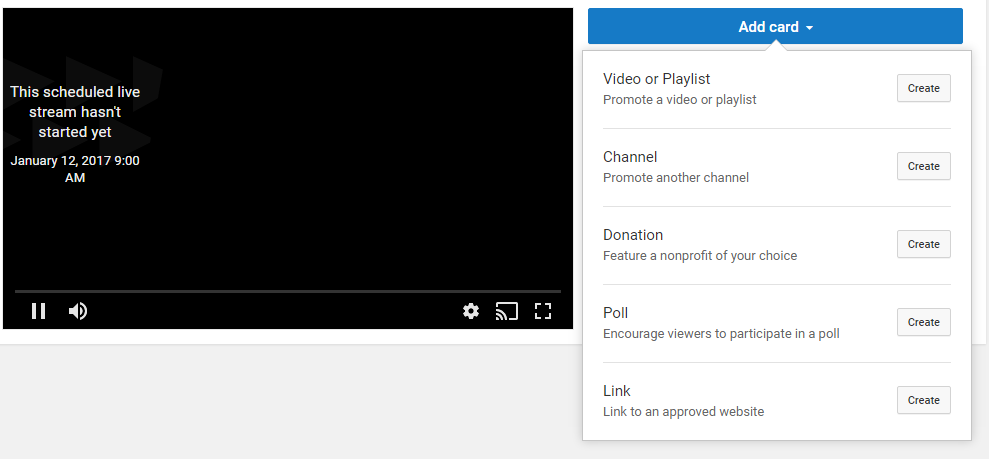
Another engaging tool that is unique to YouTube Live is Interactive Cards. This will throw an overlay atop your live stream that directs your audience into action. Features include:
- Video or Playlist: link your audience to another video
- Channel: Promote another channel
- Donation: Raise funds for a verified non-profit (more info here)
- Poll: Get your audience’s opinion in real-time
- Website: link to an approved website
Summing Up
YouTube Live has made some great updates this past year, and still largely remains unchanged from a functional perspective. With plenty of other players entering the market, it will be interesting to see how Google responds. One weapon they have added to their arsenal: VR live streaming. We are very interested in seeing that space develop!
Questions? Comments? Hate mail? Feel free to send it to nick@mainstreamchicago.com. Happy New Year, everyone!
Great info to get going. Tried live streaming a few years ago and could never figure it out where I felt confident. When running the live chat, isn’t there a delay in real-time vs response time and how long is the delay?
Thanks
Streaming can be intimidating at first, but it’s like any skill – the more often you practice, the more comfortable you’ll become.
In terms of delay: there can be as much as 20 seconds between real-time and response time. However, YouTube recently announced an ultra-low-latency mode which should substantially reduce the delay.
This article on is an incredibly informative and useful resource for anyone looking to explore the world of live streaming on YouTube. The step-by-step instructions, helpful tips, and insightful recommendations make it a standout guide in the crowded landscape of online resources. The author’s expertise and passion for the topic shine through, making it an engaging and enjoyable read.